Thursday, December 31, 2009
Friday, December 18, 2009
Crescent Holiday Tree

2 cans (8 oz) Pillsbury® refrigerated crescent dinner rolls or 1 can (8 oz) Pillsbury® Crescent Recipe Creations® refrigerated seamless dough sheet
1 container (8 oz) chives-and-onion cream cheese spread
1 tablespoon milk
3/4 medium red bell pepper
1/4 medium yellow bell pepper
1/2 cup chopped fresh broccoli
2 tablespoons sliced ready-to-eat baby-cut carrots
1 tablespoon chopped cucumber
DIRECTIONS
1. Heat oven to 375°F. Remove dough from can in 1 long roll; do not unroll or separate. Cut each roll into 8 slices for a total of 16 slices.
2. On ungreased cookie sheet, place slices cut side down to form tree. Start by placing 1 slice for top; arrange 2 slices just below, with sides touching. Continue arranging a row of 3 slices, then a row of 4 slices, ending with a row of 5 slices. Use remaining slice for tree trunk.
3. Bake 11 to 13 minutes or until golden brown. Cool 1 minute; carefully loosen from cookie sheet with spatula, and slide onto cooling rack. Cool completely, about 15 minutes.
4. Place tree on serving platter or tray. In small bowl, mix cream cheese spread and milk until smooth. Spread mixture over baked tree.
5. Cut strips from red bell pepper for garland; chop any remaining red pepper. With small star-shaped canapé cutter, cut star from yellow bell pepper; chop remaining yellow pepper. Decorate tree with bell peppers, broccoli, carrots and cucumber. Serve immediately, or cover loosely and refrigerate up to 24 hours before serving
Monday, December 7, 2009
Muffin

Tuesday, December 1, 2009
CTMH Clearance Sale!
the shopping begins Wednesday, December 2, at 9 a.m. and continues through Thursday, December 17 or while product supplies last! Sale has quantities restricted to FIVE per item to provide a smooth shopping experience for everyone. Regular priced items and clearance items cannot be combined in the same shopping cart. Order $100 or more and only pay $5 in shipping! Anything below $100 will be based on a weight shipping rate. Items are as is and can not be returned, but really would you want to at these awesome prices?
I'm told there will be stamp sets for only $2 and paper packets for $5! They are also offering grab bags for $30 filled with $100 worth of products!
Ready to start shopping? It's easy! Simply go to my website juliescott.myctmh.com at 9am December 2nd. Click on the shop online, then click clearance sale. Don't wait too long at these prices things will go fast and it's only while supplies last!
Happy Shopping!
Monday, November 30, 2009
Last Day For Stampaganza!
I will not be doing a workshop this month. I will be available if you need help with Christmas craft ideas, supplies, or gift certificates.
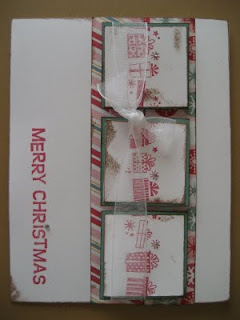
I have some Christmas card kits leftover from a workshop. They are only $4 for a set of 4 cards with envelopes. I’ll even assemble them for you if you’d like! They are first come first serve. Call or email me soon if you’d like them. A picture of the set can be found below on the last post.
The new idea book will be coming soon! We’ll be starting the New Year with our Spring Idea Book. I am also starting new groups. Here are a few of the details.
WORKSHOP ON THE GO GROUP: Do you need a girl’s night out and time to craft with friends? This group is for you! The group consists of 6 members and meets for 6 months. Each member will have a turn to be “hostess” receiving at least $25 in free product. Each month we will complete the Workshop On The Go projects. The kits are designed for scrapbookers and cardmakers! The cost of a basic kit is usually $29.95 (plus shipping & tax) with the option to add more accessories for a discount! To view samples of what the kits include go to my website juliescott.myctmh.com and click on Workshops On The Go. Tell your friends! Start your own group and receive an additional $10 of free product!
Let me know if you are interested, with only 6 spots it will fill up quickly. The first workshop group will begin in January.
FREQUENT CRAFTERS CLUB: Receive a $15 gift certificate! Buy when you want, how much you want, and what you want. The only requirement is to purchase 6 months in a row. Let me know if you want to be a part of this club and I’ll keep track for you! It’s so simple to earn free product!
If you are currently in a club, no worries, you can finish your time with the current incentives or switch to one of these groups, it’s up to you! Look for more info and pictures of projects in the January Newsletter.
I hope you all have a wonderful holiday season!
Sunday, November 22, 2009
Card Kits for Sale
 I recently did a Christmas card workshop. I have a few sets left over. I'll even assemble them for you at not extra cost. The price is $4 for 4 cards with envelopes. Let me know if you are interested by either email, call, or post. Thanks!
Thursday, November 19, 2009
Mom's Rolls


Friday, November 13, 2009
Wednesday, November 11, 2009
It's The Best Time Of Year
 This is my big project this year. I am making this box complete with handmade cards. I won't say who is getting this gift in case they read this blog, but I'm pretty sure they'll love it. All those cards you've seen me post lately, yep, they are going in this box!
 This is the perfect little friend gift. It's a card and lip gloss holder all in one. We made these a few years ago at a workshop. I had two ladies make 40 of them for their young women girls!
 Who doesn't need a countdown calendar. When it's personalized it's even better! This is made on a cookie sheet. All decked out with different accessories and stamps. Each day is attached to a craft jar with a magnet, just big enough for a little treat each day.
 Decorate a cube with cute papers and photos. Use it as a gift box or simply give it as a decoration for Grandma's shelf or Daddy's desk. Go here to see this complete project.
 Decorating the outside is just as important as the inside. Add some stamps, glitter, ribbon, and a fun ornament to the outside of your gift.
.JPG) This is called a bagelope. Perfect for any occasion. To make you simply seal an envelope, cut leaving one side longer then the other, then decorate. Fill with something small like a little treat or even jewelry! Slide the smaller side over the top, and there you have it. A custom bagelope!
This is called a bagelope. Perfect for any occasion. To make you simply seal an envelope, cut leaving one side longer then the other, then decorate. Fill with something small like a little treat or even jewelry! Slide the smaller side over the top, and there you have it. A custom bagelope! Nothing says you care like a handmade bag filled with goodies.
 Friday, November 6, 2009
Bag & Tag

Wednesday, November 4, 2009
November CTMH Newsletter
 Stampaganza is back! From November 3-30th, 2009, when you purchase any two stamp sets (sizes A,B,C,D and/or E only) at full retail price you will receive a third stamp set of your choice FREE (of equal or lesser value)- a savings of up to $22.95! Take advantage of this month's great offer to add to your stamp collection. Stamp sets make great stocking stuffers! Go here to start shopping!
 The perfect gift: A CTMH gift certificate! Each gift certificate is handmade, a sure winner with any paper crafter. Purchase a gift certificate of $50 or more and you will receive a $5 gift certificate for FREE! You can either add it to your gift or keep it for yourself. Gift certificates are made to order and can be personalized for any event. Since they are handmade, please call or email to order. This offer is good until November 30th.
 Missed the Christmas card workshop? You can still host a private workshop for your friends and get your cards free! Go to my website, or go here for more details. I only have a few dates left so call or email me to set a date!
Tuesday, November 3, 2009
Two More Cards
 I'm hosting my Ward's craft night next week. I thought it would be fun to put together a little goodie bag for everyone. This is the card that will be going in it.
Supplies to make "Thank You" card:
Boom-Di-Ada Paper Packet
Sweet Leaf Cardstock
Hollyhock Cardstock
Just Blooms Paper Flowers
Autumn Craft Buttons
Natural Hemp
Chocolate Ink Pad
Say It In Style Stamp Set

Monday, October 19, 2009
Scrapin' The Night Away


Tuesday, October 13, 2009
Tu Tu
You'll need:
4 yard of tulle (or more depending on how big the person you're making it for is)
3 yard ribbon (they suggest satin, I used grograin because that's what I had)
ruler
scissors
Here is the finished product. My daugther refuses to put it on, so no model for the picture, hopefully by Halloween she'll change her mind.
 Note: I used the sparkley tulle. It leaves glitter everywhere! Although it looks so cute, be aware you'll shine for awhile along with your kids and husband.
Monday, October 5, 2009
Christmas Card Workshop!
4 Christmas Cards & envelopes- $4 per set
4 Photo Christmas Cards & envelopes- $4 per set
4 Christmas Tags - $1 per set
Christmas Card Workshop Add On: You can add the stamp set called Holiday Trinkets and ink pads, Tulip and Juniper for only $38.35! Add these to your workshop order and you will receive 1 set of cards for FREE! Just let me know you’d like the Add On option when you call or email to sign up for the workshop!

Card #2

Card #3 (sorry it's sideways, I'll fix it soon)
 Card #4
 Photo Cards (fits a wallet sized picture)
 Tags
Tags

Holiday Trinkets Stamp Set

Saturday, October 3, 2009
Meatballs & Rice
 Meatballs & Rice
Saturday, September 26, 2009
Smore's
 Since Smore weather is almost over here in Utah I thought I'd better post this. My Aunt Joan shared this idea with our family many, many years ago. We've been making smore's like this ever since.
Wednesday, September 23, 2009
Sneak Peek!

These are the photo cards we'll be making. The blank space is for your Christmas photo. I'm still working on pricing and dates so stay tuned!
Sunday, September 20, 2009
Lemon Squares

Tuesday, September 15, 2009
Soft Sugar Cookies

Thursday, September 10, 2009
Navajo Tacos

NAVAJO FRIED BREAD
2 c. flour
Mix flour, baking powder, salt, and powdered milk. Add warm water, one tablespoon at a time until dough is formed. Knead dough until soft but not sticky. Let stand for two hours covered with a damp cloth. Shape or pat into two inch balls. Flatten into circles about eight inches in diameter. Fry dough in one inch of hot grease in a skillet or in a deep fryer. For very crisp bread make dough very thin.
Wednesday, September 9, 2009
Broccoli Out Of This World Salad

Tuesday, September 8, 2009
And The Winner Is......(PRIZE CLAIMED!)
Tiffany you have until Midnight tonight (9/8/09) to email me scrapinandstampin@hotmail.com to claim your prize. If not, another winner will be chosen.
Sunday, September 6, 2009
Tuesday, September 1, 2009
10 Card GIVEAWAY! (CONTEST CLOSED)


1. Enter by leaving a comment with your name and which card set you'd like to win. Example: Sue Stamper- Note Cards
2. Tell everyone you know about this giveaway and have them leave a comment with their name & also say you reffered them. Example: Jane Doe - Kid Friendly Card - Refered by Sue Stamper
3. Become a follower to this blog then leave a comment. Example: Sue Stamper - Follower
4. Go to juliescott.myctmh.com and look at all of Close To My Heart's fabulous paper packets. Come back and leave a comment with your name and the name of the packet you think would make great cards. Example: Sue Stamper- Animal Cookie
5. Order any Close To My Heart Paper Packet by either calling me, emailing me, or online through my website by September 7th. Come back and leave a comment. You will also automatically recieve the cutting guide and instructions for these cards free! (All contact info is on my website juliescott.myctmh.com) Example: Sue Stamper- Ordered trough website
Come back on September 8th to see if you are the lucky winner!
The winner will be chosen by random.org. The winner has until midnight September 8th. If the prize goes unclaimed a new winner will be chosen the next day.
Monday, August 31, 2009
Another Scrapbooking Retreat!
If you have any questions or would like to reserve your spot leave a comment or email me at scrapinandstampin@hotmail.com.
Fall Idea Book Is Available! Call or email me to get your free copy while supplies last!

Snowman Layout
 Birthday Layout

School Layout Out


 4 Cards